

.
Introduction
Die: verb.
To pass from physical life.
(source: Merriam-Webster)
700.4. The term dies means "is put into a graveyard from the battlefield."
(source: Magic comprehensive rules)
As a deck builder, one concept that appeals to me is synergy: the idea that the whole is stronger than the sum of its parts, and that some cards work better together than others. Some synergies are obvious - Goblin Warchief wants to be in a deck with Goblins, while Master of Etherium wants to be in a deck with artifacts. Other synergies are less obvious - Hedron Crab and Vengevine don't interact with one another directly... but one can fill a graveyard, while the other wants to be put into a graveyard.
Synergy can also turn downsides into upsides. A card like Death's Shadow makes losing life into a benefit, while Laboratory Maniac turns an empty library into a victory. This opens up a lot of options for deck building - often powerful ones, since downsides tend to be costed aggressively - consider that drawing seven cards costs seven mana, while discarding seven cards costs only one.
This is a deck built around one of the most basic negative acts in Magic: having our creatures die. Most creature-based decks want their creatures to stick around - to attack, to block, and to provide ongoing value. We take a different stance: death is just another part of life - specifically, the end. And to us, the way in which a creature dies is often even more important than the way it lived. To that end, we fill our deck with expendable creatures. We surround those creatures with ways to benefit from their death. And finally, we sacrifice those creatures, for fun and profit.
Cruel? Perhaps. But what were you expecting from the Orzhov?
This is an aristocrats-style deck built around generating tokens, then sacrificing them for value.
.
Commander Analysis

Mana cost:
Teysa is a member of the Orzhov Syndicate, the guild on Ravnica representing black and white mana. As enemy colors, black and white have many resonant parallels - life vs death, Black Knight vs White Knight, the group vs self. This carries into many of the themes associated with Orzhov colors - the Extort mechanic gains life by taking it from our opponents, while the Afterlife mechanic turns our creatures' deaths into more life.
At three mana, Teysa is on the cheaper side for a commander - she's able to come down early, and we can recast her several times if she gets sent back to the command zone. There are also some cards such as Sun Titan and Unearth which are specifically capable of reanimating small creatures, which we may take advantage of.
In terms of color identity, white and black are known for their premium removal, such as Vindicate and Wrath of God - there are few card types that Orzhov can't deal with. Black also provides tutors and card draw, while white offers more interaction for noncreatures. However, as a color pair, Orzhov does not have particularly good access to interaction on the stack (the best we can do is black discard or white tax pieces), and its ability to ramp is also fairly lacking (most black ramp options only benefit swamps, while most white ramp options require having fewer lands than your opponents).
Type: Legendary Creature - Human Advisor.
Humans are one of Magic's most common creature type, appearing on almost every plane and in every color. There are some tribal support cards, mostly hailing from the plane of Innistrad, making them a fairly powerful tribe in Modern, with cards like Champion of the Parish and Thalia's Lieutenant. Human tribal decks tend to lean towards small aggressive creatures, which isn't a particularly powerful archetype in EDH, but there are some payoffs that are more valuable to us.
Advisors are mostly in Esper colors, with most of them either being in the Orzhov or Azorius guilds on Ravnica. However, as the only tribal payoff isn't in our colors, this tribe isn't very valuable to us.
Stats: 2/3
Three toughness makes Teysa a little hardier than some commanders, but still on the small side - she dies to Lightning Bolt. Two power means commander damage isn't very likely either, unless you're playing something like Cathars' Crusade. However, this low power does have some significant upsides, allowing Teysa to benefit from some of white's small-creature-friendly cards.
Sacrifice three white creatures: Exile target creature.
A targeted exile ability which serves great as a rattlesnake... or a sacrifice outlet if you have lots of expendable tokens. This is, fundamentally, a 1-for-3 card disadvantage, which means we need some way to generate lots of bodies if we want to take advantage of it repeatedly. Repeatable exile is very powerful though, and the mere threat of activation can stop some players from attempting to combo or play scary things.
Whenever another black creature you control dies, create a 1/1 white Spirit creature token with flying.
Oh hey, a way to generate lots of expendable bodies! This is the more heavily-used of Teysa's abilities, allowing us to double-dip on sacrifice effects, assuming we're sacrificing black creatures. The tokens also have flying, which makes them good at carrying equipment or serving as chump blockers. Alternatively, we can use Teysa's ability to soften the impact of a board wipe - if we have a lot of black creatures get killed at the same time as Teysa, we'll end up with a board full of spirit tokens. These tokens can also be used to fuel various spirit synergies.
This deck may not be for you if:
- you want to play big creatures
- you dislike complicated and cluttered board states
- your meta has tons of grave hate
- you're not comfortable winning with combo
You may enjoy this deck if:
- you like tokens and going wide
- you want to win by grinding out your opponents with incremental value
- you value having uses for your creatures other than attacking and blocking
- you enjoy synergistic decks with many interconnected pieces
Other Commander Options
Show
Hide
- Teysa Karlov - Teysa 3.0 is another excellent commander for an aristocrats-style deck - we run her as part of the 99. Many 3.0 decks are focused less on tokens and more on creature that natively have death triggers.
- Ayli, Eternal Pilgrim - a more efficient sac outlet in the command zone, who works well with lifegain and sacrificing bigger creatures.
- Judith, the Scourge Diva - an option for aristocrats in Rakdos colors. Can have a somewhat more aggressive slant due to her anthem, but the ping ability is a potent control option with deathtouch.
- Athreos, God of Passage - if you can put enough pressure on your opponents' life totals, has a powerful recursion ability. Sometimes seen at the head of an army of Shadowborn Apostles.
- Elenda, the Dusk Rose - also benefits from many creatures dying. Can go both big and wide, although there are a few hoops to jump through due to her only triggering on death (meaning you can't send her to the command zone).
- Ravos, Soul Tender and Tymna the Weaver - both partners offer card advantage in the command zone, and have abilities that work well with a more aggressive focus.
- Krav, the Unredeemed and Regna, the Redeemer - these partners provide lifegain, a sacrifice outlet, token production, and card draw - pretty much everything one could ask for. They're also on the more expensive side.
.
Deck History

the second card in the deck
This deck has gone through a lot of changes over the years, partially because there are so many cards worth consideration - any card related to tokens, sacrifice, or the graveyard is potentially worth including, and those are all extremely popular themes that get revisited in most sets. I'm now up to around eleven Commander decks, but this one is still the one I tweak the most often - the puzzle of balancing sacrifice outlets vs token producers vs payoffs (while still running enough ramp and card draw) is a problem I don't know if I will ever be able to fully solve.
Teysa herself has also gone through changes, with two new versions being released in the returns to Ravnica. Despite that, I still believe that the original is the best commander for this deck - no other option provides as much support for a token-based strategy.
.
Decklist
Decklist
Approximate Total Cost:
$100 Budget Build
Show
Hide
Non-Budget Build
Show
Hide
.
Card Discussion
a brief note on card choices
Show
Hide

not appearing in this decklist
I definitely keep an eye on more expensive cards though - I try to cover additional options when applicable.
token production
Show
Hide

snake? snake? snaaaaaake!
- Jadar, Ghoulcaller of Nephalia - repeatable free token production. The token can't block, but you can sacrifice it easily by attacking. Can be awkward if you have lots of decayed tokens though.
- March of the Canonized - a token army (with lifelink) that can also make more tokens in the lategame. Getting enough devotion is usually pretty easy.
- Adeline, Resplendent Cathar - generates a lot of tokens, assuming you have creatures to attack with. The 1/1s she creates may not live through combat... but with three opponents, she lines up very well with Teysa's ability to turn them into removal.
- Ophiomancer - makes a token on every upkeep, assuming you have a sacrifice outlet. Deathtouch also makes the snake a great blocker.
- Anointed Procession - doubles up token production, although it also has a big target painted on it.
- Chittering Witch - token producer, sac outlet, removal. It wears a lot of hats.
- Court of Grace - produces evasive tokens every turn, plus it brings Monarch into the game. This deck tends to be pretty good at claiming to crown due to its evasive tokens, and Court obviously helps enable that.
- Hero of Bladehold - an aggressive beater that can give you two tokens every turn, while also making your other creatures into slightly better attackers.
- Keeper of the Accord - conditional token production and conditional ramp, but it's a nice way to catch up if you're behind. It goes up in value if you have ways to control your creature or land count, such as a sac outlet or Lotus Field.
- Thousand Moons Smithy // Barracks of the Thousand - a single beefy token on the frontside is just so-so, but the backside represents a very respectable army.
- Tombstone Stairwell - we don't have a ton of ways to fill our graveyard, but our creatures do tend to die a lot. Gets very silly alongside Teysa, capable of spawning massive numbers of tokens on every upkeep.
- Blessed Sanctuary - makes all your creatures bring a friend along. Also protects from burn and damage-based board wipes.
other options
Show
Hide
I've chosen to focus on cheaper token production, but many options exist.
- Darkest Hour - a combo with Teysa - we can sacrifice any creature to make a now-black spirit, giving us as much sacrifice fodder as we want. At only a single mana, it's quite efficient. Doesn't do anything without Teysa out though. It does turn off Teysa's spot removal.
- Bitterblossom - the gold standard, providing a very efficient tokens-to-mana ratio given sufficient time.
- Dreadhorde Invasion - Bitterblossom #2. Repeatable free-ish token production. Does need a sacrifice outlet to get a new body though.
- Pawn of Ulamog - turns creatures dying into Eldrazi Spawn. As efficient as things can get.
- Open the Graves - turns creatures dying into Zombies, which we can use alongside Teysa to triple-dip on sacrifice value.
- Teysa Karlov - not technically token production, but she allows us to double-dip on all of our death triggers, including Teysa 1.0. This can provide a lot of value if you have other payoffs for things dying, such as drawing cards or draining life. Granting lifelink and vigilance to our tokens is a bit of incidental upside that works well with any evasive tokens we have.
- Painter's Servant - Darkest Hour #2. Will often be easier to recur if it dies too, and doesn't turn off Teysa's exile ability.
- Endrek Sahr, Master Breeder - a powerful token producer, although a little pricey at 5 mana.
- Requiem Angel and Ogre Slumlord - more token producers that trigger on creature deaths. Requiem Angel can do some interesting things alongside Divine Visitation.
- Lingering Souls, White Sun's Zenith, and other one-shot token production - if you want your tokens no-questions-asked.
- Lena, Selfless Champion - can be a bit win-more, but she also protects your board.
- Xathrid Necromancer and Rotlung Reanimator - can be fun if you're running enough cards of the appropriate tribes.
- Skirsdag High Priest - will often require sacrificing a different token to turn on Morbid, but big flying demons are big flying demons.
- Twilight Drover - turns tokens dying into more tokens. A bit mana-intensive, but can make a lot of tokens.
- Elspeth, Knight-Errant, Sorin, Lord of Innistrad, and other planeswalkers - can be powerful if you have the tools to protect them. 1/1 blockers aren't always the greatest though.
- Oketra's Monument and Spirit Bonds - turn creatures being cast into more tokens, which can be interesting alongside something like Gravecrawler. They do mean you play a bit more into board wipes though.
- Regna, the Redeemer - capable of generating many tokens, assuming you have consistent sources of lifegain. This version of the deck likely doesn't have enough, but it is a direction that could be built into.
- Curse of the Restless Dead - turns landfall triggers into expendable zombies. Can be used on either yourself or the ramp player.
- Ghoulish Procession - produces a token whenever something dies. Decayed is technically a downside, but it can also be an upside because the tokens have a built-in way to be sacrificed.
- Blight Mound - turns creatures dying into Pests, which we can use alongside Teysa to triple-dip on sacrifice value.
sacrifice outlets
Show
Hide
the cost is more important than the payoff
- Viscera Seer - at one mana, it's among the cheapest free sacrifice outlets available.
- Altar of Dementia - artifacts are harder to kill than creatures. Also fills our graveyard or can serve as a win condition.
- Bartolomé del Presidio - free sacrifice outlet that can grow into a threat. Can also eat artifacts, for some reason.
- Cartel Aristocrat - protects itself through the sacrifice of others. Also a human, which can be relevant.
- Spawning Pit - a free sac outlet that doubles as a token producer. You can sacrifice your board in response to a wrath, then redeploy at half-strength.
- Elder Arthur Maxson - another sac outlet that can protect itself, this time with indestructible. Can also pump your tokens if you want to get aggressive.
other options
Show
Hide
There are many sacrifice outlets available, depending on what your goals are.
- Ashnod's Altar - almost never played fairly. Being a mana ability means it gets around split-second. We don't have that many expensive spells to ramp into off it, but extra mana is often useful.
- Blasting Station - turns tokens into removal. Can also serve as a win condition.
- Carrion Feeder - another cheap sacrifice outlet. Can get quite big with enough food.
- Phyrexian Altar - turn bodies into colored mana. Arguably even more powerful than Ashnod's Altar.
- Sadistic Hypnotist and Mind Slash - turn extra bodies into discard. May also cause loss of friends.
- Dimir House Guard - a sacrifice outlet, or a tutor. Such flexibility for such a bony body!
- Ayli, Eternal Pilgrim - costs mana to activate, but lifegain can be useful.
- Whisper, Blood Liturgist - turns extra bodies into reanimation, if you want to build into that theme.
- Martyr's Cause - suddenly, any creature can chump block any attack. Also shuts down Comet Storm and friends, although it doesn't stop Exsanguinate.
- Vampiric Rites and Krav, the Unredeemed - a bit expensive, but card draw is nice. Consider Regna, the Redeemer too.
- Woe Strider - another sac outlet, but this one brings a friend! Also recursive in case it gets destroyed.
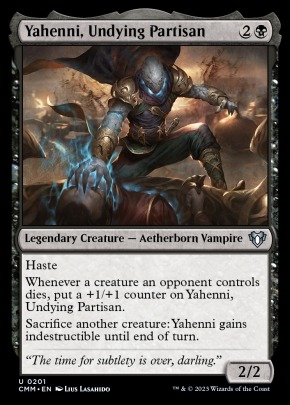
- Yahenni, Undying Partisan - another sac outlet that can protect itself, this time with indestructible. Also gets pretty big if enough things die.
interaction
Show
Hide

solve target problem
- Blot Out the Sky - produces a bunch of tokens, and doubles as a way to wipe out any pesky artifacts / enchantments / planeswalkers. A very flexible card.
- Heliod's Intervention - solves X target problems.
- Martial Coup - a board wipe that also gives us a small army of tokens.
- Priest of Forgotten Gods - makes our opponents sacrifice creatures, while serving as a sacrifice outlet, mana dork, and card draw for us. It wears many, many hats.
- Anguished Unmaking - solves any problem, at the low cost of three mana and three life.
- Stroke of Midnight - instant-speed answer to almost anything, with a minor downside.
- Hagra Mauling // Hagra Broodpit - a removal spell that doubles as a land. Flexibility is good, as is keeping stuff like Elesh Norn, Grand Cenobite off the table.
- Kaya, Spirits' Justice - a flexible planeswalker, providing grave hate, token production, and removal. Note that you can sacrifice the creature you target in response to her (-2). Her static ability can also do very interesting things.
- Merciless Eviction - one of the most flexible board wipes available. Exile means we don't need to worry about any sort of recursion. Good at dealing with decks built around planeswalkers, artifacts, or enchantments, which are often otherwise pretty resistant to removal.
- Ondu Inversion // Ondu Skyruins - a board wipe that doubles as a land. Flexibility is pretty good.
other options
Show
Hide
There are many options for removal in both black and white. White also provides access to hate cards, while black offers discard. Your interaction suite should usually be reflective of your meta - if people are running problematic creatures, run more spot removal. If people are playing lots of graveyard strategies, run more grave hate.
- Generous Gift - flexible spot removal for anything.
- Grave Pact - turns all our spare tokens into edicts. Capable of keeping most boards clean if it sticks around.
- Dictate of Erebos - as with Grave Pact, it's a very good way to keep the board clean.
- Cathar Commando - instant-speed artifact/enchantment removal that can be recurred, and it provides a death trigger. Can also serve as a surprise blocker in a pinch.
- Leonin Relic-Warder - temporarily deals with an artifact or enchantment, or permanently if we sacrifice it with the trigger on the stack. Can also combo with Animate Dead.
- Fiend Hunter - solves a creature problem temporarily, or permanently if we sacrifice it before the first trigger resolves. Can also target our own creature if we want to trigger its enters-the-battlefield effect again, or combo with Angel of Glory's Rise / Sun Titan.
- Grand Abolisher - shuts down almost all interaction on your turn, letting you combo in peace. One of the best answers available to countermagic, since Orzhov doesn't have a lot of stack interaction.
- Utter End, Vindicate, Despark, and other flexible removal - all worth consideration if you want more answers to noncreature problems.
- Aven Mindcensor - shuts down tutors of all flavors. This deck can have difficulty with big green decks, and shutting down their land-based ramp slows them down significantly.
- Decree of Pain - wipes the board, and draws a giant pile of cards. The cycling ability can also be relevant if you're expecting countermagic.
- Swords to Plowshares, Path to Exile, and other spot removal for creatures - if you're running into Elesh Norn, Grand Cenobite or Kalitas, Traitor of Ghet, then consider running some more spot removal - board wipes are overkill, but Teysa's ability doesn't work well with them out.
- Return to Dust, Crush Contraband, Aura of Silence, and other Disenchant effects - many options exist if you feel like you have creatures under control.
- Kalitas, Traitor of Ghet, Withered Wretch, Nihil Spellbomb, and other graveyard hate - annoying for us to see on the other side of the table, but that goes in both directions. Kalitas in particular can also function as a token producer and sacrifice outlet in a pinch.
- Kambal, Consul of Allocation - Orzhov isn't known for its ability to interact on the stack, but this is a major headache for any sort of storm-based deck. Or any other deck that is light on creatures.
- Dawn Charm, Lapse of Certainty, Rebuff the Wicked, Imp's Mischief, and other countermagic - most of what is available is a little narrow, but people rarely expect these effects out of nonblue decks.
- Teferi's Protection, Second Sunrise, and other protective spells - if you expect to run into a lot of board wipes, consider a way to protect or recur your team.
- Syr Konrad, the Grim - makes wrathing the board or exiling our graveyard very awkward. Also does piles of damage alongside pretty much any game action.
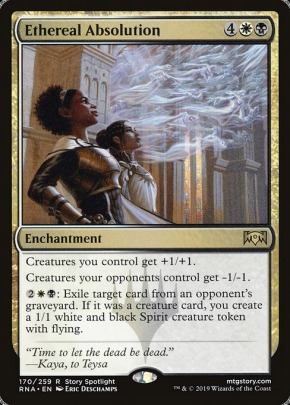
- Ethereal Absolution - we aren't running a lot of good ways to deal with go-wide strategies other than mass removal (which will also clear our own board). This can serve as a powerful check to opposing go-wide strategies, while also serving as a token producer and grave hate.
draw
Show
Hide

every body gets to draw cards
- Scorn-Blade Berserker - a cheap and expendable body that cantrips twice.
- Skullclamp - one of the most efficient card draw effects available, turning every spare token into two cards.
- Bloodghast - free-to-recur and expendable body.
- Mask of Memory - cheap to cast and equip, and works well with any evasive bodies we have (such as Spirit tokens). Also fills the graveyard to set up future recursion.
- Staff of the Storyteller - turns token production into cheap card draw, and it brings along a friend for immediate value.
- Wernog, Rider's Chaplain - depending on how cooperative your opponents are, this could potentially create up to four clue tokens (or more, if you're at a large table), while also yielding a body to sacrifice. That's a lot of value.
- Dark Prophecy - turns creature deaths into more card draw. Unique in that it also triggers on tokens, unlike most similar effects. The trigger is mandatory, so consider finding some lifegain if you find yourself running low on life.
- Morbid Opportunist - yet another way to turn death triggers into card draw. Only triggers once per turn, but it can trigger off both your opponents' creatures and tokens, which makes it quite consistent as an engine.
- Tocasia's Welcome - turns most of your creatures into incremental card draw. Note that you can trigger it on opponents' turns too.
- Tymna the Weaver - more ways to trade life for cards. Works best if we have evasive creatures available (usually spirit tokens).
- Welcoming Vampire - turns all your token production and other small creatures into incremental card draw. Can also trigger on opponents' turns if you have instant-speed token production.
- Hostile Negotiations - draws cards and fills the graveyard. Giving your opponents control over your draw can be awkward though.
- Smothering Abomination - more ways to draw cards from the deaths of our creatures. It does need food, but still draws a card even if it ends up cannibalizing itself.
- Ao, the Dawn Sky - a solid beater that your opponents will probably want to deal with... and when it dies, it digs pretty deep to generate some nice value.
other options
Show
Hide
Black offers many options for trading life for cards. White's card advantage options are a bit more limited, but there are also many artifact-based draw engines that are worth consideration.
- Erebos, Bleak-Hearted - two mana is a little steep for a card, but Erebos is indestructible and provides a sac outlet and some removal if necessary.
- Rumor Gatherer - turns your creatures into scry value, or actual card draw. It works well if you are able to flood the board quickly, or if you can turn some black creatures into spirits.
- Tenacious Underdog - mostly here for the blitz ability. Four mana (and two life) for a card isn't particularly efficient card advantage, but when it comes with a free death trigger and potentially a token, it starts to look like a nice bit of value.
- Mentor of the Meek - one of the more powerful payoffs for running lots of small creatures, turning every token into extra cards.
- Necropotence, Necrologia, and Ad Nauseam - some of the most powerful ways to trade life for cards. Can be awkward if you've already put a lot of pressure on your life total, but they're first-class in terms of efficiency.
- Phyrexian Arena - a classic source of black card draw, trading life and time for cards.
- Syphon Mind - in a four-player game, this is effectively a Harmonize with upside. Actual results vary depending on the number of players in the game.
- Gonti, Lord of Luxury - a bit of filtering to go with our card advantage. Deathtouch makes them a good blocker, and taking the card from an opponent's deck can give access to effects we don't otherwise have access to. Also very entertaining to recur repeatedly, and can serve as a janky win condition when looped a bunch with Reveillark.
- Well of Lost Dreams - in the opposite direction, Well is a way to convert lifegain into card draw. If you run more lifegain, it may be worth consideration.
- Bygone Bishop - we're running a lot of cheap creatures, so turning them into more card draw is useful.
- Sign in Blood, Night's Whisper, Ancient Craving, Read the Bones, and other one-shot effects - all good options if you expect a faster game, and want your card advantage immediately.
- Fell Stinger - Sign in Blood attached to a useful body.
- Yawgmoth, Thran Physician - a sacrifice outlet that turns creatures and life into more cards.
- Sword of Fire and Ice - if you're running an equipment package, there are options for repeatable card draw other than Skullclamp.
- Coercive Portal, Mind's Eye, Endless Atlas, and other artifact-based card draw - depending on the contents of your deck and your requirements for card draw, there are many colorless options worth consideration. The black card draw is usually more efficient though.
- Scroll Rack - a classic combination with Land Tax, if you happen to be running it.
- Bolas's Citadel - a way to turn life into mana and cards. Even better if you have lifegain or topdeck manipulation.
- Plumb the Forbidden - the perfect response to any board wipe - cash in your board to draw a bunch of cards. It can also just cycle in a pinch.
- Grim Haruspex - more card draw from creature deaths. We don't have any other morphs in here, so hiding its identity is rarely worth it.
- Midnight Reaper - similar to Grim Haruspex. Causes life loss, but also triggers from its own death.
- Idol of Oblivion - turns token production into card draw.
- Liliana's Standard Bearer - a great way to profit from a board wipe, but it also works well with just sacrificing a bunch of tokens.
recursion
Show
Hide

rise, so that you may fall once more
- Animate Dead - recurs any creature, from any graveyard at an extremely efficient rate. We're not a dedicated reanimator deck, so we don't have a ton of beefy creatures to grab back, but that is a direction that could be built into.
- Nether Traitor - a cheap, recursive body. Shadow means it can't block, but it is good at carrying equipment.
- Priest of Fell Rites - a cheap way to recur any creature, assuming it lives a turn cycle. It also has unearth, which gives a (mostly) uncounterable way to reanimate something. Very strong card to fetch off Buried Alive.
- Lurrus of the Dream-Den - a nice way to recur your small creatures and other cheap stuff over and over for value.
- Archpriest of Shadows - assuming you have an evasive body to attack with, this provides some immediate reanimation, plus additional value if it sticks around. Deathtouch is also a nice keyword, both offensively and defensively.
- Guardian Scalelord - more backup! Grants evasion and triggers on attack, which gives it some nice upside over Archpriest of Shadows, but it's harder for it to recur expensive things.
- Invasion of Tolvada // The Broken Sky - recurs something immediately and can provide tokens and a nice anthem if you can flip it.
- Living Death - mass reanimation is fun. Can backfire if our opponents have lots of problems in their graveyards, but that is why we run grave hate and exile effects. Also works well if we can set it up by sacrificing our board beforehand. Alternatively, use it as a board wipe when appropriate.
- Reveillark - more synergy for little creatures, this time in the form of recursion.
- Sun Titan - one of the few ways we have to reanimate noncreatures. Can serve a lot of functions, depending on what you have available.
- Angel of Glory's Rise - a very powerful payoff for building Human tribal. Incidental hate for Zombie tribal decks is nice, but the main draw of the card is the one-sided mass reanimation effect.
other options
Show
Hide
Both white and black have many options for reanimation and recursion. Most of these effects only work on creatures, but there are some other options.
- The Restoration of Eiganjo // Architect of Restoration - a flexible value card. Fetches a land, recurs something small, and eventually flips into a token producer.
- Body Launderer - lets you loot whenever your creatures die... and when it dies itself, you can recur most of the creatures in the deck. Also a solid combo piece.
- Karmic Guide - reanimates any creature from our graveyard, no questions asked. Works very well as part of a recursion loop.
- Storm of Souls - a bit like Living Death, but one-sided. Size doesn't matter if you plan to sacrifice all the recurred bodies anyway (or if you can just combo off)
- Reanimate, Unburial Rites, Exhume, and other reanimation spells - at their best in a dedicated reanimator deck, but they all work well if we can get things worth reanimating into our graveyard.
- Dusk / Dawn - the front half is an asymmetric board wipe that leaves our small creatures alive. The back half returns any fallen small creatures to our hand, of which we have many.
- Phyrexian Reclamation - trade life and mana for recursion, at a reasonably efficient rate. We don't always have enough diversity in our creatures to go full toolbox-mode with our recursion, but being able to buy back something specific is still nice.
- Sheoldred, Whispering One - both a reanimation target and an enabler.
- Athreos, God of Passage - depending on the creature that dies, we may or may not get it back. Still, Athreos is hard to deal with, and the life loss adds up over time.
- Unearth - many of our creatures are on the smaller side, so this is one of the most efficient reanimation spells available.
- Patriarch's Bidding, Primevals' Glorious Rebirth, Rise of the Dark Realms, and other mass reanimation effects - powerful if built around.
- Xiahou Dun, the One-Eyed - one of the few ways to recur noncreatures in black.
- Ghouls' Night Out - reanimates a bunch of creatures from multiple graveyards. Decayed is a significant downside, but four bodies for five mana is extremely efficient.
- Reassembling Skeleton, Bloodghast, Gravecrawler, Bloodsoaked Champion, and other self-recurring creatures - some of these have requirements to fulfill, so keep those in mind. However, free(ish) sacrifice fodder works very well with Teysa and our other cards that care about creature deaths.
- Prowling Geistcatcher - assuming you have a sac outlet, it keeps your fallen creatures in limbo until they can be sacrificed again. Also a very strong combo piece alongside many other recursion creatures.
mana
Show
Hide
mana may be exchanged for goods and services
- Sol Ring - the most-played card in the format for a reason.
- Dowsing Dagger // Lost Vale - a very powerful ramp spell, assuming you can flip it consistently. Throw it on a 1/1 spirit token, otherwise wait for an opponent to not have any blockers.
- Lotho, Corrupt Shirriff - a cheap body capable of producing lots of treasure. Even if opponents don't trigger it, you can still trigger it yourself. You can also sacrifice it in a pinch if the life loss is too much.
- Orzhov Signet - a cheap and efficient mana rock, which also provides filtering.
- Sword of the Animist - a cheap way to repeatedly ramp. We have a lot of cheap creatures that can carry it.
- Talisman of Hierarchy - another cheap mana rock.
- Pitiless Plunderer - turns all our creatures into Lotus Petals. Or treasures, I suppose. A very powerful mana engine when active.
- Smothering Tithe - taxes and slows down our opponents, or provides ramp. Both modes are useful.
- Eagles of the North - cycles for a land and fills the graveyard for mass reanimation and similar effects.
- Troll of Khazad-dûm - cycles for a land and fills the graveyard for mass reanimation and similar effects.
other options
Show
Hide
Although we don't have access to the best ramp spells, options do exist.
- Fellwar Stone, Charcoal Diamond, Mind Stone, and other cheap mana rocks - all worth consideration if you want more early ramp.
- Legion's Landing - a 1-mana ramp spell that can also make tokens, assuming you can flip it.
- Crowded Crypt - acts as a slightly inefficient mana rock in the early game, but in the lategame, you can crack it for an instant army.
- Burnished Hart - sacrifices itself to provide ramp. Fetching lands makes it more resilient than most other ramp we have access to.
- Land Tax, Tithe, Knight of the White Orchid, and other white ramp - often requires you to have fewer lands than your opponents, but can be very efficient when active.
- Deep Gnome Terramancer - somewhat meta-dependent, but can usually turn into a land or two and an annoyance for your opponents.
- Weathered Wayfarer - fetches up lands repeatedly if you're behind on them. If you're running it, consider also running more utility lands.
- Boreas Charger - if you're behind on lands, it can catch you up.
- Magus of the Coffers, Crypt Ghast, and other swamp-matters cards - this version of the deck doesn't run enough swamps to properly support them, but black decks are capable of producing very large amounts of mana in conjunction with cards like these.
- Solemn Simulacrum - a pile of value, and a bit of ramp.
- Dark Ritual, Culling the Weak, Songs of the Damned, and other rituals - this deck isn't built around them, but one-shot effects can provide a lot of acceleration if you want to do something unfair.
- Black Market - capable of producing very large amounts of mana if it is active for any amount of time. We don't have any giant X spells like Torment of Hailfire to pump it into, but that is a direction that could be built into.
lifegain
Show
Hide
why spend your own life when you can use someone else's?
- Blood Artist - turns deaths into life drain. Often functions as a win condition to go along with a sacrifice loop, but can also add up quickly over the course of a game - if enough creatures are on the board, it may prevent an opponent from resolving a board wipe.
- Zulaport Cutthroat - similar to Blood Artist, it turns deaths into life drain. Only triggers on our own creatures, but it also hits all of our opponents and bypasses hexproof. Human tag is also relevant.
- Elas il-Kor, Sadistic Pilgrim - another drain effect, this time on a deathtouch body.
- Bastion of Remembrance - another instance of Blood Artist, but being an enchantment makes it a bit more resilient to removal, while also making it immune to Wrath of God effects.
- Wispdrinker Vampire - a little more expensive, but it has a nice 2/4 flying body and triggers on ETB. The second ability can also give some additional lifegain in the lategame, or make attacks awkward for opponents with deathtouch.
other options
Show
Hide
There are many cards capable of incidentally gaining life, ranging from any creature with lifelink to the more exotic.
- Soul Warden, Soul's Attendant and Auriok Champion - more ways to gain life from creatures.
- Authority of the Consuls - some incidental lifegain attached to a potent anti-aggro effect - this deck doesn't enjoy being attacked by large hasty threats.
- Suture Priest - only gains life from your own creatures, but also hinders opposing creature-based strategies.
- Ayara, First of Locthwain - similar to other drain effects, but triggers as an ETB effect instead of a death trigger. She can also serve as a sacrifice outlet and draw engine, giving her a useful collection of abilities.
- Dawn of Hope - potentially a payoff for our lifegain, but it also enables itself with the lifelink tokens. Not necessarily efficient, but being able to draw cards and generate tokens gives it a lot of flexibility.
- Exsanguinate and Debt to the Deathless - at their best when you can generate massive amounts of mana and use them as a win condition, but also capable of being used to add a sizable buffer to your life total.
- Gray Merchant of Asphodel and Kokusho, the Evening Star - both very nasty when recurred repeatedly, capable of performing mini-Exsanguinates over and over.
utility lands
Show
Hide

the market is always open
- Barad-dûr - repeatable source of token production. Note that you can activate it for 0 to immediately trigger Teysa or other death triggers.
- Bojuka Bog - grave hate on a land. We usually value hitting our land drops over holding it back, but it's still usually worth the cost of entering tapped.
- Castle Ardenvale - often enters untapped, and acts as a token producer.
- Castle Locthwain - often enters untapped, and acts as card draw if you're in need of gas.
- High Market - yet another sacrifice outlet. The lifegain is pretty minor, but sometimes we just really want our creatures to die.
- Vault of the Archangel - turns our 1/1 tokens into real blockers, and can also gain some life if we need to.
- War Room - similar to Castle Locthwain, it provides a bit of card draw if you're looking for action.
other options
Show
Hide
Other options exist in the utility land slot. When considering other options, compare the value get from them versus the consistency of playing another basic. Alternatively, if you're playing them to get more value from your land slots, it may be worth instead playing a spell that generates more value. If you're playing more utility lands, consider additional ways to fetch them, such as Weathered Wayfarer.
- Strip Mine, Wasteland, and other land-destroying lands - worth consideration if you find yourself running into problematic lands across the table.
- Volrath's Stronghold - a bit inefficient, but it is recursion on a land.
- Buried Ruin - can be useful if you find important artifacts dying frequently, such as Skullclamp or sacrifice outlets.
- Phyrexian Tower - another sacrifice outlet on a land. This one even ramps!
- Westvale Abbey - a token producer on a land. Also flips into a giant demon.
- Field of the Dead - if you're running enough different lands, it's pretty efficient token production. Tapped and colorless makes it a big opportunity cost though.
- Mistveil Plains - worth consideration primarily because it is one of very few ways to get instants and sorceries back into our deck, which can be relevant if you're doing a lot of tutoring.
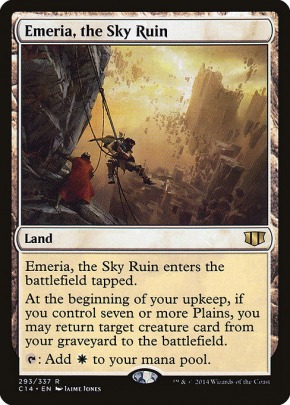
- Emeria, The Sky Ruin - a powerful recursion option if the game goes long. We're not able to turn it on as easily as a mono-white or Selesnya deck, but we do have some ways to repeatedly fetch basics out of our deck.
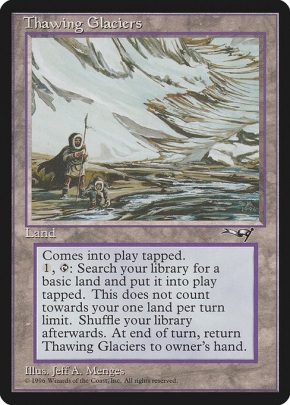
- Thawing Glaciers - a bit on the slow side, but it is card advantage in the land slot, and means you'll be able to hit land drops very consistently. Works even better if you have ways to untap it or copy the effect. It is capable of turning on Emeria by itself, assuming sufficient Plains.
- Urborg, Tomb of Yawgmoth + Cabal Coffers - one of the most powerful ramp tools available on lands. Urborg also provides fixing, but having access to this enables running heavier mana sinks in the deck.
mana-producing lands
Show
Hide

when one color of mana just isn't enough
- Plains and Swamp - basic lands are great - they enter untapped and are resistant to hate. Balance them as your colors demand, or run more utility lands.
- Caves of Koilos, Command Tower, Isolated Chapel, Marsh Flats, and Tainted Field - untapped fixing.
- Myriad Landscape - a bit of ramp in the land slot.
- Orzhov Basilica - a little mana smoothing in the land slot. Can be useful alongside cards which care about how many lands you have relative to your opponents.
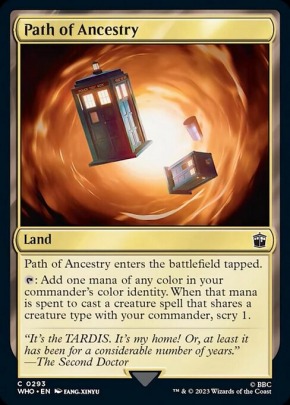
- Path of Ancestry - a bit of incidental scry. Yet another perk to running more Humans.
- Scoured Barrens - yet another tapped land. Can be useful if you have more of a lifegain focus.
- Snowfield Sinkhole and Sunlit Marsh - more tapped fixing, this time with land types.
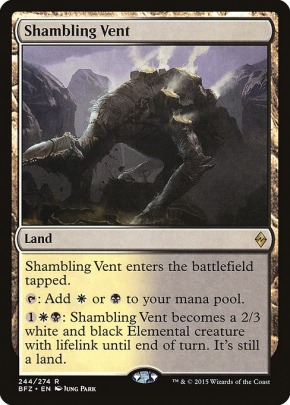
- Shambling Vent - manlands are useful here because they can serve as sacrifice fodder in a pinch.
- Temple of Silence - tapped fixing, but the incidental scry can be useful.
other options
Show
Hide
More than any other category, your manabase is going to depend on your budget - some players will be running original duals and all the relevant fetchlands, while others will be stuck with guildgates. Use what you have access to.
- Scrubland, Godless Shrine, Fetid Heath, and other untapped fixers - always worth including.
- Verdant Catacombs and other fetchlands - also worth including. Their value goes up if you have more lands with basic land types.
- Mana Confluence, City of Brass, and other untapped-fixing-with-downside - again, worth consideration if you find yourself wanting better fixing, and aren't encountering too much pressure on your life total.
- Forsaken Sanctuary and other tapped lands - try to avoid them, but may be necessary if you find yourself needing more fixing.
- Orzhov Guildgate - not a great fixing land.... but at least it has Teysa flavor text!
tutors
Show
Hide

it could be anything, even another tutor!
- Buried Alive - fetches cards directly into the graveyard. Great for setting up mass reanimation spells, but can also be used to fetch Reassembling Skeleton or other graveyard-friendly creatures for value. Best friends with Priest of Fell Rites.
- Demonic Tutor - likely the best tutor in the format, capable of fetching anything for only two mana.
- Stoneforge Mystic, Stonehewer Giant, Open the Armory, Steelshaper's Gift, and other equipment tutors - we have several pieces of equipment worth fetching (especially Skullclamp). If you're running these, consider also running more equipment for different situations.
- Enlightened Tutor, Idyllic Tutor, and other white tutors - these can be on the narrow side, but we have many artifacts and enchantments worth fetching.
- Diabolic Intent, Vampiric Tutor, and other black tutors - unconditional in what they can fetch, but may have additional costs.
- Expedition Map - an efficient way to fetch up particularly important utility lands. If you're running Urborg + Coffers (or anything else worth fetching), it's one of the best ways to grab them.
- Sidisi, Undead Vizier - turns any spare token into a tutor, while leaving behind a respectable body.
- Entomb - throws a card directly into the graveyard. We don't have a ton of reanimation, but it can also fetch flashback spells like Unburial Rites or Dusk // Dawn.
- Rune-Scarred Demon - often better as a reanimation target, but providing a large body is always appreciated.
- Razaketh, the Foulblooded - a premium reanimation target, capable of assembling many combos by itself (assuming sufficient expendable creatures).
.
Strategy
Plan A: Value

card advantage: the basis of many strategies
The other type of value we care about is mana production. The more mana we have, the more things we can do. The simplest way to generate more mana is to hit our land drops, which will generally require card draw. However, there are also some other options we have to generate more mana - Sword of the Animist, Black Market, and recurring Burnished Hart are all examples. One thing to note is that we are generally not going to be able to keep up with a dedicated ramp deck - we aren't running a ton of mana rocks, and we don't have nearly as many ramp options available to us as a green deck would. As a result, our goal when ramping isn't to cast more expensive spells - we aren't planning to win by casting a giant Exsanguinate or Genesis Wave. In fact, our curve is generally going to top out at six mana. Instead, our ultimate goal when ramping is much purer: speed. We want to be able to cast more spells per turn so our opponents have fewer windows to disrupt our plans.
Plan B: Combo
Ultimately, neither drawing cards nor ramping are going to win the game - for that, we turn to combo. Our end goal for drawing cards is to find our combo pieces, and our end goal for ramping is to have enough mana to deploy them in a single turn. Our combo engines actually look pretty similar to our card advantage and mana production engines - they generally trigger off having creatures die, and want us to feed them with expendable tokens. However, the place that differs is the output - Blood Artist drains our opponents of life, Altar of Dementia mills them out, and generating infinite tokens can let us just win through combat.
Plan C: The Fair Way
putting a well-stocked graveyard to use
Switching Gears
When to switch from focusing on value to focusing on combo is generally going to depend on what resources we have available. If we already have some combo pieces available, we can start digging or tutoring for what we still need. Alternatively, if our opponents are tapped low or running low on cards, that may provide an opening for us to combo out without needing to care about interaction. I've definitely won games immediately following a Torment of Hailfire or Cyclonic Rift depleting the resources of most of the table. The third situation where it may be worth focusing on combo is if we, personally, are running low on resources - if the board keeps getting wrathed and we can't stick a value engine, it may be a good idea to just stockpile cards in hand until we have everything we need.
On the other hand, there are times that trying to combo is a bad idea. If our opponents are holding open lots of mana for interaction, it can be better to hold back and wait for other opponents to play threats and force out removal. If someone successfully sticks a problem card and it isn't quickly dealt with, the coast is probably clear for us. Alternatively, it can be risky to combo if we can't do everything necessary in a single turn - if we play out an important creature and the board gets wiped, that could set us pretty far back. In that case, we should try to only expose combo piece we have redundant copies of. Alternatively, play out cards that will generate value even if they get removed.
.
Building an Engine

definitely not being used for anything nefarious
The first ingredient of any engine is creatures. Ideally, we'll be using tokens as our fuel - they are expendable, replaceable, and come in bulk. Black tokens are particularly valuable, since Teysa lets us use them twice, but we also have other ways to generate more tokens. The alternative to tokens is recursion - if we have some way to grab back the same creature repeatedly, we can sacrifice it over and over. Many cards we have specifically trigger off nontoken creatures, so this can be preferable for some engines. Finally, if we have enough expendable creatures, we can sometime use that to kickstart our engine - we'll run out of fuel quickly if all we have to feed our engine is a Soul Warden and a Zombie token, but any fuel is better than nothing at all.
Example token producers: Darkest Hour (with Teysa), Ophiomancer, Open the Graves
Example recursion cards: Reassembling Skeleton, Sun Titan, Angel of Glory's Rise
The second ingredient of our engine is a way to burn the fuel - more explicitly, a sacrifice outlet. Some sac outlets cost mana or have timing restrictions, but the best ones are free and instant-speed (or even better, mana abilities). If we don't have a sac outlet, combat and board wipes are also options - it's possible for us to come out of some board wipes with more creatures than we started with. The main concern is that if we wait too long for our creatures to die, then they may instead be bounced or exiled. Also note that sac outlets are generally redundant in multiples - if you have one available, there usually isn't a need to play out an extra.
Example sacrifice outlets: Cartel Aristocrat, Ashnod's Altar, Smothering Abomination
The third ingredient for our engine is to hook it up to some sort of valuable output - when our creatures die, we want some way to extract value from their deaths. What type of output this is is going to decide whether the engine is an actual win condition, or just a value engine. Drawing cards is usually the first output we care about, since it can draw us into other types of output. However, for our engine to truly be perpetual, we'll need for one of our outputs to be more expendable creatures to feed back in.
Example payoffs: Blood Artist, Skullclamp, Grave Pact
Sample Engines and Combos
Show
Hide
Infinites:
- Darkest Hour + Teysa: sacrifice any creature, get back a 1/1 black flying spirit token. Allows for infinite sacrifices.
- Fiend Hunter + Sun Titan, Angel of Glory's Rise, or Karmic Guide: Fiend Hunter exiles the other creature. Sacrifice Fiend Hunter, and it returns, to return Fiend Hunter again.
- Karmic Guide + Reveillark: Karmic Guide returns Reveillark. Sacrifice Karmic Guide. Sacrifice Reveillark. Reveillark returns Karmic Guide and another small creature.
- Leonin Relic-Warder + Animate Dead: Animate Dead returns Leonin Relic-Warder. Relic-Warder exiles Animate dead, which causes Relic-Warder to die. Animate Dead returns again.
- Pitiless Plunderer + Reassembling Skeleton + Teysa (or another token producer): Sacrifice Reassembling Skeleton, producing a Treasure and a token. Sacrifice token for another Treasure. Sacrifice Treasures to return Skeleton.
- Tombstone Stairwell + Teysa: On each upkeep, create a bunch of Tombspawn tokens. At end of turn, they will all die, creating a bunch of Spirit tokens.
- Reassembling Skeleton, Phyrexian Reclamation, or Dawn of Hope + mana: pay mana, make (or recur) bodies.
- Ophiomancer: get a token on each upkeep. Sacrifice it for value.
- Spawning Pit: sacrifice creatures, get counters. Use counters to make tokens, then sacrifice them again.
- Add in Blood Artist or Zulaport Cutthroat to drain out your opponents.
- Add in Viscera Seer to scry for whatever you need.
- Add in Grim Haruspex or Smothering Abomination to draw cards.
- Add in Altar of Dementia to mill out your opponents (or yourself, if you have mass reanimation).
- Add in Pawn of Ulamog, Pitiless Plunderer, or Ashnod's Altar for mana.
- Add in Grave Pact or Teysa to remove all of your opponent's creatures.
.
Playing the Game
For our opening hand, we'll typically look for 3-4 lands, and some sort of card draw. The deck requires a critical mass of pieces to function. As a result, while we could rely on drawing into those pieces naturally, it is usually better to have some way to dig deeper into our deck. If you don't have any card advantage, instead look for some sort of ramp or acceleration.
Sample hand 1
Show
Hide


A little shaky, but keepable. We'll get a bit of scrying off the Path of Ancestry to help with the flood, and Tymna can draw some cards. If you're going last or don't expect to be able to freely attack and get a Tymna trigger, it may be worth throwing back.
Sample hand 2
Show
Hide


Throw back. Neither Yahenni nor Athreos do anything without other creatures. It might be keepable if you had an amazing land to fetch up with Expedition Map, but that is unlikely. Worth keeping if you're already down a card though - throw back a land and fetch up Thawing Glaciers to make up for the mulligan.
Sample hand 3
Show
Hide

Keep. We don't have any expendable creatures yet, but we have a fantastic card draw engine in Skullclamp and a ramp engine in Sword of the Animist. It may be worth sandbagging Skullclamp until we can get immediate value.
Early Game
a good way to hit every land drop
Playing Teysa out on turn 3 is usually a safe choice - she isn't a high enough profile target for people to burn removal on that early. Her 2/3 body is also pretty reasonable on curve - we have a couple of pieces of equipment for her to carry, and three toughness is enough to survive most early combats. Still, this deck isn't really focused on winning via combat damage - holding her back on blocking duty is usually a good idea if you aren't going to get some sort of benefit.
Mid Game
start putting your creatures to work
At this stage of the game, board wipes may be start to be played. This is one of the reasons we focus so much on generating value from our creatures - if we've already gotten value from our creatures, we don't care if they die. Try not to extend too much into a board wipe if you don't think you can recover - instead, hold creatures back until you can get more value from them. Still, if your creatures do die, don't worry too much. We have ways to generate plenty of value from a well-stocked graveyard.
Late Game
This deck wins by generating a critical mass of synergistic pieces, so finding a win condition is inevitable, assuming you can draw through your deck quickly enough. Once you have enough mana, start trying to figure out how you are going to win, given the resources you have available. If you happen to have a mass reanimation spell, try to find a way to stock your graveyard - either sacrifice a bunch of creatures for value, or just draw a bunch of cards and discard to hand size. Alternatively, if you have several parts of an infinite combo, hold them in hand while you try to draw or tutor for the remaining parts.
Another option is to just keep grinding out value - given enough card draw, you'll usually find some way to close out a game. At this point, it may be possible to pivot your value engine from card advantage to board control - either keep the board clear with Grave Pact, or just shoot down all the problematic creatures with Teysa. This is the phase of the game that board states can get bloated, so playing out a Blood Artist and making a lot of creatures die can also serve as a win condition if life totals are low enough. The deck is capable of winning with minimal preexisting board state, so bide your time and find an opening.
Backup Plans

nuke it from orbit. it's the only way to be sure.
If your board gets wiped: this is what mass reanimation is for. We also run normal recursion.
If your combo piece gets exiled: always inconvenient, since it hurts our recursion and mass reanimation plans. The deck runs a lot of redundant combo pieces, so find a replacement for whatever is lost.
If Teysa is stolen: annoying, but the deck functions without her. She also doesn't do much for most opposing decks, so they are unlikely to try that hard to keep her around.
If an opponent plays a bunch of scary things: we play board wipes and spot removal. It may be possible to point them in a different direction using Teysa as a rattlesnake.
If an opponent plays a hate card: Humility, Rest in Peace, Cursed Totem.... there are a lot of cards that shut down our strategy. Find some removal for it - most of ours exiles, so you won't need to deal with it again.
.
Change Log
changelog
Show
Hide
Older changes on Tappedout
8/13/2019 - initial version
10/20/2019 - primer status!
2/1/2020 - THB swaps
9/11/2021 - Pre-MID swaps
10/7/2021 - MID swaps
11/6/2021 - Pre-VOW swaps
8/14/2022 - Misc swaps
10/4/2022 - Misc swaps
6/27/2023 - Cutting combos
11/27/2023 - LCI swaps
5/15/2024 - OTJ changes
8/13/2019 - initial version
10/20/2019 - primer status!
2/1/2020 - THB swaps
9/11/2021 - Pre-MID swaps
10/7/2021 - MID swaps
11/6/2021 - Pre-VOW swaps
8/14/2022 - Misc swaps
10/4/2022 - Misc swaps
6/27/2023 - Cutting combos
11/27/2023 - LCI swaps
5/15/2024 - OTJ changes


