
Breya, Etherium Shaper: Dominance of the Etherium Machine


Introduction
Welcome to the Primer on Breya, Etherium Shaper.
After the Shards of Alara rejoined together, the Esperites set out on a desperate voyage for the mythical stone carmite, the key element for creating the Aether-connecting metal etherium. This metal is a lightweight material and very strong but most importantly acts as a conduit for enchantments to sustain organic life for an extended period of time (it's how Tezzeret the Seeker survives even though his torso is missing a significant portion of flesh!).
It is, quite literally, the Philosopher's Stone for extending life in Esper.
So Breya ventured into the harsh and hostile Jund territory and made an incredible discovery…
Huge caches of carmite, the mythical stone needed to create more Etherium.
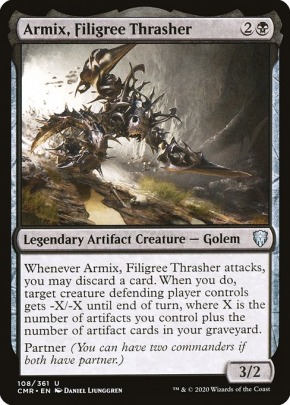
Utilizing her already significant metalcrafting skills and magical capabilities, Breya created Jund-influenced etherium metal and grafted it onto a golem construct. Armix, Filigree Thrasher was a masterful success at following orders and carrying out Breya's commands, a sentient golem that could expertly carry out her will.
Seeing this success, Breya immediately crafted more etherium and replaced parts of her organic body until nearly her entire body was made of the metal.
But there was something not quite right with the carmite. You see, Armix was still successful at executing Breya's command and was still unquestionably loyal to her. But it was becoming more violent, more brutal in carrying out those commands.
His previously firm acts of subdual became bloody interventions. Direction to explore new areas and bring back data resulted in violence as Armix diligently followed Breya's orders.
And Breya's own magic had been enhanced in subtle and powerful ways, new levels of power that had never been seen before in Esper.
It was time for her own Noble Work to begin.
"Wasted potential surrounds us. Lend me that bauble, and let me see what it can be made to be." - Breya, here
Commander Analysis
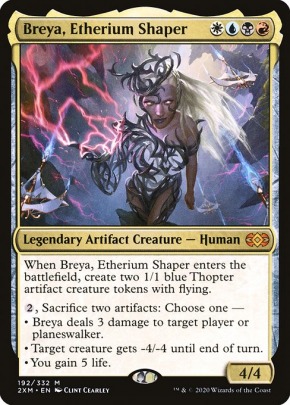
Breya is just a really good Commander. She brings Flying bodies with her when she enters the battlefield, has great stats for her mana cost, and has an activated ability that is phenomenal at being a solid utility effect you should always look to utilize. She functions as a sac outlet in the Command Zone as well as an infinite Mana Outlet as well. In short, Breya is awesome but comes with a huge reputation that you need to play around in one form or another. Let's dive into my analysis of why you should play Breya.
Pros
Pros of Playing Breya
Show
Hide
- Breya's art is hella cool, let's face it. How many other MTG cards have thopters, lightning, and an organo-metallic badass girl in their frame? I'll wait.
- Breya has the four best colors for Artifact synergies. Between the Mirrodin block, Kaladesh block, Alara block, Scars of Mirrodin block, Urza's saga block.... oh wait, there's basically a bajillion good Artifact cards that you could run in your deck! Seriously, the card pool for Breya is staggeringly massive and you can put your own kind of signature on your deck and still have it be VERY unique to you. Breya is basically a blank canvas of opportunity. You don't even HAVE to focus on Artifacts because she has such powerful abilities.
- Did I mention that Breya could simply be an ETB Commander and do EXTREMELY well in this role? Or that she could be a Control commander? Or a highly-tuned combo machine? Looking for an awesome Polymorph Commander? Stax? The sheer amount of options and completely different synergies found in this color combination are overwhelmingly good. Her respective power level can be scaled as high as you want it to go (cEDH builds DEFINITELY exist) or you can play a more fair strategy. She is an inherently strong card by herself and your decklist will ONLY enhance her abilities and utility.
- Breya's activated abilities are VERY good at their respective roles. The primary one you'll use most frequently is sac-ing two artifacts to give a creature -4/-4. The number of creatures that this ability kills is VERY comprehensive and this ability offers you an incredible ability to control which creatures live and which don't. But let's not neglect her other abilities. Gaining 5 life by sac-ing two artifacts can help you recoup life from table aggression OR from certain life paying card-advantage machines. And when you're ready to finish off a player, you can throw some artifacts at your opponent's faces to take them out.
- When Breya ETB she brings in two flying, blue, 1/1 thopters. These tokens are EXTREMELY abusable and is one of the primary things that attracted me to her as a Commander (besides her stellar art). Want to get an overpowered Artifact via Arcum Dagsson? What about Skullclamp? Yawgmoth, Thran Physician? Think of the possibilities with Goblin Welder. And since the tokens are BLUE, you can immediately get ahead on mana with Grand Architect's ability and power out more Artifacts. Speaking of mana advantage, Urza, Lord High Artificer immediately turns Breya and her thopters into Counterspell mana, so you can cast her and immediately protect your board or stop a dangerous play.
- These are the BEST colors in MTG for clean, unconditional removal; powerful and cheap stack interaction; the best card advantage engines available; and the best options for to-battlefield recursion. The resiliency and power level of the card pool in Breya's colors cannot be overstated, so if you're looking to play the best cards available in MTG you should definitely check this list out.
- Finally, and perhaps most importantly for me, this is the Commaner where it actually makes sense to run my two ALL-TIME favorite MTG characters in the same list: Urza and Yawgmoth. With her drive to begin her own Noble Work, she also fits thematically with what Urza and Yawgmoth both espoused in their own respective character bios: mechanical perfection. So, for me, Breya accurately captures a narrative theme that drives my own personal deck-building interests. Breya, and this decklist, aims to tell a story while ALSO being a fun EDH deck to play.
Cons
Cons of Playing Breya
Show
Hide

- Breya will likely draw the attention of your table regardless of how you've built her. Because of her strong combo potential and the sheer power and synergies she can play into, your opponents will always be wary of what you do, if not outright targeting you from the get-go. Or maybe that's just me having developed into the Boogeyman of my playgroup. Hmm...
- Breya is an Artifact creature, so that opens up additional avenues of her being removed or stopped. She's affected by traditional removal effects as well as Naturalize effects and Stony Silence type of effects. Artifact-neutralizing effects are VERY difficult to manage (although there are plenty of ways to remove them or stop them from resolving in these colors).
- The sheer amount of options Breya offers can be overwhelming from a deck-building perspective. Should you include some ETB synergies? How many artifact synergies should you run? Which combos are the best to be playing? This kind of strategy variability and breadth of options can be intimidating and paralyze your deck-building choices. I've tried to include the best options for the various strategies that I prefer to play, but I could be diluting the power of the deck by trying to do too many things all at once. I'll leave that to you to decide, dear reader!
"I craved enlightenment, and Crucius's etherium opened my eyes. I would share my sight with you, but first you must believe." - here
Alternative Commanders
Alright, so you love Artifacts and want to show those silly dirt-mages why heavy-metal rules (double-pun! YES!). Here are some other options that you could consider for your glorious mechano-orchestra:

- Memnarch - the original Mechanical overlord of excellence, I actually have a Primer on him that I've maintained since 2014 on MTGsalvation (wow, that's been quite a while). He makes an appearance in my own personal decklist because I have a lot of nostalgia for Memnarch in addition to him being powerful, but I'll let you read my Primer to learn more about him.
- Urza, Lord High Artificer - the original Artificer, @Theoric has an excellent Primer for a highly optimized Urza list that is EXTREMELY powerful to play. Urza also makes an appearance in my list but I personally like the option of including more colors to my decklist instead of playing mono-Blue. Besides, Memnarch has already stolen my heart for my mono-Blue Commander of choice. Check out theoric's excellent Primer here for more details on how you could build a powerful Urza-centric list.
- Daretti, Scrap Savant - a mono-Red Artifact-centric Planeswalker that you can play as your Commander? Very interesting design space to consider. @Guerte has a great Primer for an optimized Daretti list that you can check out here. It plays a heavier Stax/recursion strategy and is a great reference for you in considering additional recursion engines for your own playlist.
- Teshar, Ancestor's Apostle - Toshi has an excellent Primer about how to use the Bird o' Doom. Teshar is a combo monster and utilizes some truly unique cards and interactions in order to win games in one big turn. If you want to read about the recursion and combo loops of da Bird, check out @Toshi's beautiful Primer here.
- Tawnos, Urza's Apprentice - being able to copy abilities is super powerful and his CMC is delightful. When Paradox Engine was banned, Tawnos lost a lot of appeal to the general community, but he's still a great card for copying Breya's abilities and other abilities within the deck.
- Jhoira, Weatherlight Captain - Do you like drawing cards? Do you like Artifacts? Do you like drawing cards AND playing Artifacts? Jhoira enables you to draw a card any time you cast an Artifact spell, which can be absurd value. She tends towards a combo-centric build because of her ability, but she's certainly a fine inclusion for any Artifact-centric list because of the card advantage that she can generate.
- Sharuum the Hegemon - probably the original cEDH monster that everyone was afraid of when EDH first became a thing back in 2009 (Yeah, I've been playing EDH that long, lol). Sharuum is an ETB recur-to-play effect stapled onto a pretty beefy Flyer. Blinking her will make sure that you always have a full board of powerful Artifacts and you can even play a Reanimator strategy of sorts. She's strong enough that she earns a spot in the 99 but I like that Breya's ETB brings tokens to play and having a clean infinite mana outlet in the Command zone.
- Alela, Artful Provocateur - a newcomer to the world of Artifice, Alela rewards you for casting Artifacts similarly to Jhoira but in a different form: Faerie tokens. Spawning tokens on cast is very powerful and Alela can fuel quite a few strategies herself. I recommend her as an alternate Commander for a more mid-range/Stax approach to Artifacts, as Alela is not an infinite mana outlet in the Command Zone (sadly).
- Elsha of the Infinite - playing Future Sight in your Command Zone is incredibly powerful and being able to basically play at instant speed is fantastic. Elsha also enables a two-card combo to draw your deck with Sensei's Divining Top and a cost-reducer (think Etherium Sculptor or Helm of Awakening). Once you have your deck in hand, there's multiple ways to win. My preferred method? LAZER BEAM OF DOOM.
- Akiri, Line-Slinger + Silas Renn, Seeker Adept - one of the few ways to get all 4 colors in the deck while still playing a heavy Artifact theme. This Commander pairing can be VERY powerful as an Aggro deck. With good equipment, fast mana rocks, maybe a few extra combat step cards, and you suddenly have a meaningful and powerful way to quickly kill your opponents. I liked Breya's ability to spawn bodies more than I liked the static abilities of these two Commanders, but don't ignore these two Commanders as a powerful pair to helm your Artifact strategy.

"Etherium is limited. Innovation is not." - here
Current Decklist & Alternative Decklists
The current configuration of my decklist is found below.
I personally find it easier to see each card sorted according to function, so I've listed the decklist accordingly. Each section is sorted by the Converted Mana Cost (CMC) of the card.
Breya: Etherium Combo Control
Approximate Total Cost:
Alternative Decklists
The above decklist has some pretty expensive cards and is built for a High-Power meta. But, being the compulsive cEDH player that I am, I wanted to attempt to offer several other decklists for your consideration as well. One will be Budget and another will be a cEDH Monstrosity.
The cEDH Decklist
cEDH Breya
Show
Hide
There is a solid and VERY powerful cEDH variant of Breya that exists that is an expansion of the Fast Combo lines this deck can include. I personally don't prefer the Lion's Eye Diamond combos but readily admit that they are inherently powerful.
If you're looking to spam Combo lines and compete at the highest levels, I encourage you to check out Guerte's Breya list here. It plays the fastest mana and combos available to it with an excellent package of Control options available.
My own personal cEDH list looks more like this:
If you're looking to spam Combo lines and compete at the highest levels, I encourage you to check out Guerte's Breya list here. It plays the fastest mana and combos available to it with an excellent package of Control options available.
My own personal cEDH list looks more like this:
Breya, cEDH Style
Approximate Total Cost:
Budget Build
Show
Hide
For those of you who don't have huge budgets and want to build this deck for around $150-ish dollars, this list is meant for you. It won't focus so much on going infinite with some sort of combo and will instead focus on Value and Board Control.
Budget Breya Control
Approximate Total Cost:
Esper mages devised their weapons to be so devastating that war seemed unncessary. - here
Playing the Decklist
Ah yes, the primary purpose of this Primer. The overall purpose of this decklist is to establish solid Control over the table so that it can easily pivot into a Combo line with an advantage. It has several engines that can be assembled to either exert Control over the game or create an insurmountable advantage for you that winning becomes academic.
But, first, let's break down the types of opening hands you should be looking for in order to get the best type of game experience possible. The opening hand dictates which specific strategy (fast Combo or slower Control) that you should be leaning towards, though this can change pretty quickly depending on what you draw.
Opening Hands & Mulligans

The general things I like to look for are 2-3 lands, 1-2 mana sources, 1-2 Tutor effects, 1-2 Card Draw cards, 1-2 Removal cards. Some sample hands will be shown here so that you can get an idea of what I personally look for in a starting hand.
Sample Hand #1
Show
Hide


This is actually a really solid opening hand. It's not particularly flashy but it allows us to build towards a T3 Breya with an active Sensei's Top to help sculpt the draws a little bit more. It is land light though, so you could fall behind in board development if the 4th mana source isn't secured.
Sample Hand #2
Show
Hide

This is a fairly risky hand. If we draw another Black source of Mana in the first 2 turns, we'll have Bolas's Citadel powered out on T3 and will likely bury the rest of the table in Card Advantage alongside an active Urza as well. If we don't, we'll be color-screwed but with an active Urza in play. I would personally say to risk it since the chances of finding a 3rd Black source are decent and the power of this hand would be incredible otherwise.
Sample Hand #3
Show
Hide


Yet another great hand! Thanks, opening hand simulator on MTGNexus! Our T1 is definitely going to be a Vampiric Tutor into Mana Crypt so that we can power out a T2 Grand Architect. You know what's really cool about Breya? She creates blue creature tokens into play when she resolves. Architect therefore becomes a huge acceleration piece for the deck with its heavy artifact count. In fact, this hand will look to cast Chromatic Orrery on T3 via the Crypt and Architect and then leverage the Orrery's ability to draw cards to refuel once Breya resolves. Notion Thief is here to disrupt any Card Advantage engines that want to be deployed by our opponents.
Now that you have an understanding of what kinds of opening hands we're generally looking for, it's time to understand the nuances of this deck and how its Primary strategy is executed. The rest of the following section will be about the general overview of I how develop my Board state and Card Advantage engines as well as some tips on tutoring, sequencing, and subtle strategies that I've learned through playing this deck in a few dozen games. It will be separated into General stages, based solely on my vast experience playing Commander.
Early Game Stages: Turns 1-4
Some circumstances where this might be different is if an opponent has a faster start than you do. This may mean that you need to spend a tutor in the early game finding a Toxic Deluge or something similar so that you can start establishing Board control or disrupting their strategy as soon as possible. Or if someone is spending a lot of time tutoring and you know they're a dedicated Combo deck, it might be more beneficial for you to tutor or hold up mana for removal.
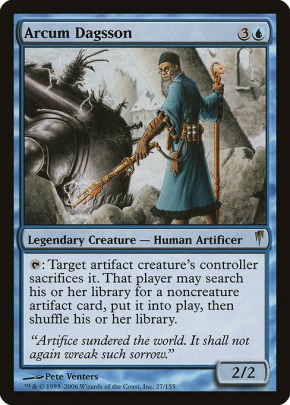
Otherwise, this is a deck where you want to try and plan out your turns in advance. For example, if I have Arcum Dagsson in hand with enough mana to cast him on T3, I should definitely do that before casting Breya because I'll be able to activate Arcum's ability immediately on resolving Breya. A single Arcum activation could be the difference between catapulting ahead of the table and establishing a crucial advantage for your strategy or getting left behind in your opponent's tempo.
Mid-Game Stages: Turns 3-6
Ideally, you have Breya in play at this point and have accumulated a significant mana advantage over your opponents. There is a bit of sequencing and prioritization that I mentally go through once I have this advantage, but this is the point where I'm generally looking to start creating an Engine of some sort. For me, the Mid-Game consistently happens around T4-T5 and where I need to start paying attention to my opponent's boards and opportunities to push my advantages.
It's also at this stage of the game that you want to keep an eye on what your opponents are doing as well. They will be attempting to deploy similar strong Card Advantage engines for themselves, so do what you can to disrupt their strategies. There's a light Counterspell package in the deck and I would recommend saving those for non-creature spells, as Breya's ability to kill most things with her -4/-4 ability makes creatures slightly less worrisome. Otherwise, you want to keep a good pulse on the table so that you can determine who's trying to pull ahead in Board or Card Advantage so that you can use politics and timely removal spells to interact or disrupt their strategies.
I should also tell you that this list, as it's currently built, is FAST. There's quite a bit of fast mana available to you in the deck, which means that you may be able to ignore what your opponents are doing in favor of executing your own strategy. Breya can combo almost as fast as a sneeze with a number of different cards in the deck and the synergies that you can put together quickly is delightful. If possible, I try to personally pursue this kind of strategy because I would rather dictate the pace of the game and force people to react to ME instead of the other way around. This means if an opportunity to assemble a combo presents itself to you, do it. This deck has a ton of resiliency and tutor power, so you should be able to assemble a winning combo engine pretty quickly and consistently in this deck. My personal combo line that I prefer to tutor for is Dramatic Scepter (combo line explained down below) because it's mana efficient and quick to assemble, but the Grand Pili-Pala line comes up quite a bit too.
Once you've created an advantage for yourself OR have started building a combo board-state, you're ready to advance into the late stage of the game
Late Game Stages: Turns 6+

This is the point where you should be able to have total Board Control and can freely swing into your opponents and kill them via Combat Damage. No joke, I think 50% of my wins come from Combat Damage because executing an infinite combo is extraneous to the Board state I have. Either way, you want Yawgmoth to stay in play and you want to keep feeding creatures to his ability to draw cards and kill other creatures. Supplementing Yawgmoth with additional Card Advantage sources is ideal so that if Yawgmoth dies you can continue to hum along with an active Liliana or Necropotence. Ironically, Skullclamp is actually a Card Advantage engine that I look to get in the Late Game stage because I'm able to use it more effectively in the Late Game stage rather than the Mid-Game stage. The Late Game stage for this deck is all about eliminating the last few creatures that may have survived your Mid-Game and to firmly establish Board Control, so evaluate your decisions accordingly. Massacre Wurm is an excellent way to increase the power of this deck's core strategy by shocking your opponents for each creature that they lose. This ability has a way of quickly killing opponents in conjunction with the sheer amount of removal this deck effects. Don't neglect the power of Westvale Abbey as well. This decklist can reliably transform the Abbey into Ormendahl, Profane Prince and that's a great way to regain life that you've previously spent!
If however, you don't have a solid grasp on the Board past T8, then you can actively tutor or look to assemble an infinite combo. I outline the primary ones below, but do note that there are many, many ways to combine the various cards in this Decklist to gain Board Control in one, giant turn. One thing that's nice about this deck is that while it does have the potential to infinitely combo and kill the table that way, it doesn't need to. This gives you great flexibility in how you play the game and allows you to scale your deck to your playgroup!
Combos

- Combo #1: Isochron Scepter + Dramatic Reversal + + one mana of any color generated from Mana Rocks + Breya, Etherium Shaper AKA The Dramatic Scepter Combo
Combo #1ShowHideThis is a very well-known commodity at this point, but I'll still go through the details explicitly. The nice thing is that this combo can be executed in one turn and only requires to resolve and activate.- Cast Isochron Scepter and have it resolve via protection. Once it resolves, imprint Dramatic Reversal from your hand via the Scepter's trigger.
- Activate the Scepter's activated ability to cast a copy of Dramatic Reversal. Before this copy resolves, tap all of your mana rocks available to add mana to your mana pool, ideally a rock that can add one mana of any color.
- Once the Dramatic Reversal copy resolves, it will untap all of your mana rocks AND the Isochron Scepter itself.
- Repeat the previous two steps to create infinite mana of all colors.
- Cast Breya from the Command Zone and activate her ability to sacrifice herself and one of her Thopters to deal 3 damage straight to an opponent's face. Repeat this step, courtesy of the infinite mana from the previous step, until your opponents are dead.
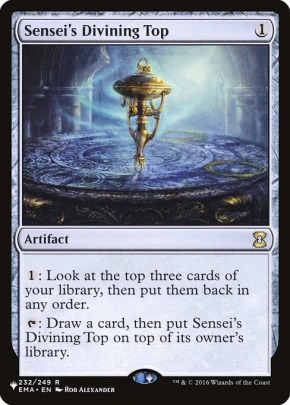
- Combo #2: Bolas's Citadel + Sensei's Divining Top + Aetherflux Reservoir
AKA The Sensei's Citadel Combo
Combo #2ShowHideThis one is fairly easy and intuitive to understand, methinks, but I'll go through the mechanics of it below. The end result is that you will gain an enormous amount of life and be able to shoot each of your opponents with an Death Star Laser beam of Doom.- Get Bolas's Citadel into play alongside Sensei's Divining Top and Aetherflux Reservoir.
- Activate the Top's ability to draw the top card of your deck and put the Top on top of your deck.
- With the Citadel's ability to cast the top card of your library by paying life equal to its CMC, you then pay 1 life to cast the Top.
- Aetherflux Reservoir will trigger, and you will gain 1 life for each spell you've cast this turn. This will probably equal 1 life.
- Repeat steps 2-3, only this time the Reservoir will gain you 2 life. The Reservoir will exponentially gain you life as you continue to cast the Top, which combo is gated by the number of cards you have left in your library. Just remember to subtract 1 from the life total you gain from the Reservoir to account for you casting Top!
- Combo #3: Grand Architect + Pili-Pala + Breya, Etherium Shaper AKA The Grand Pili-Pala Combo
Combo #3ShowHideThe above combo will allow you to generate infinite mana which you can then use to cast Breya repeatedly, sacrificing herself to her ability to gain infinite life... or just infinite damage with her player targeted Lightning Bolt. This combo can be executed in a single turn (no Haste required!), so long as you have 4 mana, with at least present. The exact mechanics are as follows:- Cast Grand Architect, leaving at least open. Once he's resolved, activate his ability to add to your mana pool that can only be used to cast Artifacts or activate an Artifact's ability.
- Why, Great Scott, Pili-Pala happens to be an artifact that costs exactly ! Convenient. Cast the Pili-Pala. Then, with the leftover from Step 1, turn our friendly scarecrow into a Blue creature.
- Because the Architect's mana ability applies to any Blue creature and doesn't require that creature to tap, you can immediately tap Pili-Pala to add to your mana pool.
- Use that to activate Pili-Pala's untap ability (since you JUST tapped it in the previous step), netting you one mana of your choice.
- You then repeat the previous two steps to generate infinite mana of all colors. Cast Breya, then activate her ability to sacrifice herself and one of her Thopter tokens to deal 3 damage to someone's face. Rinse and repeat until the rest of the table has been smoldered.
- Combo #: Eldrazi Displacer + Ashnod's Altar + Breya, Etherium Shaper/Marionette Master AKA The Eldrazi Altar Combo
Combo #4ShowHideThe above combo will allow you to generate infinite colorless mana which you can then use to blink Breya or the Master repeatedly via Eldrazi Displacer and then sacrificing her Thopter horde for infinite damage to your opponent's faces. Or you can sacrifice all your Servos and use the Master's ability to kill the table, either outlet works! It's the most mana intensive Combo in the deck but it can be executed in a single turn, no haste required!
- Cast Ashnod's Altar and Eldrazi Displacer. Ideally, you'll have Breya already in play with perhaps a Thopter token available to sacrifice to the Altar. If not, then you'll need mana to recast Breya AND activate the Displacer's ability in one turn.
- Cast Breya (if she's not already in play), and activate the Displacer's ability to blink Breya. When Breya ETB, she'll spawn 2 more Thopter tokens that you'll use in the next step.
- Sacrifice the two Thopters to Ashnod's Altar to create . All of this mana is colorless, which you can then funnel into the Displacer's ability.
- Activate the Displacer's ability to blink Breya again, creating two new Thopters for the Altar. But, this time you'll have netted .
- Repeat the previous two steps to create infinite colorless mana.
- Once infinite colorless mana has been achieved, you can then blink Breya infinite times via the Displacer's ability, creating infinite Thopters.
- Then, sacrifice those infinite Thopters via Breya's ability via the infinite colorless mana to deal 3 damage to each opponent's fragile, non-Etherium face until they've been crisped to charred pieces.
She can heal the flesh, or exploit its many weaknesses. - here
Card Choices
Creatures
Creatures
Show
Hide
Artifacts
Artifacts
Show
Hide
Instants
Instants
Show
Hide
Sorceries
Sorceries
Show
Hide
Enchantments
Enchantments
Show
Hide
Planeswalkers
Planeswalkers
Show
Hide
Lands
Lands
Show
Hide
- Ancient Tomb - the Sol lands are generally useful and this one powers out some strong turns when it's drawn. The new art looks pretty cool and is a possible vector that Yawgmoth might have stuided.
- Urborg, Tomb of Yawgmoth - turning all of our lands into Swamps is great, particularly for Coffers.
- Nykthos, Shrine to Nyx - this deck can accumulate quite a bit of Devotion, so this land often taps for 6+ mana when I do activate its 2nd mana ability.
- Cabal Coffers - because this is a Mono- deck with 15+ Swamps. Combine with Urborg for extra awesomeness and mana generation.
- Phyrexian Tower - this card has overperformed for me in so many ways. It's flavorful and sacrificing Tokens for extra mana is a great way to power out more expensive spells. They new Art looks totally awesome, although I'm a sucker for the old art I have.
- Westvale Abbey - being able to create Tokens on a land is pretty awesome. Being able to then sacrifice Tokens to create a 9/7 Indestructible Flying Lifelinker is even better. This deck can transform the Abbey pretty reliably, so make sure you evaluate any opportunities to transform it so you can regain life.
- Blast Zone - general removal at any CMC range is very valuable. Use this card sparingly, however, as we don't run any way to recur it outside of Yawgmoth's Will.
- Arcane Lighthouse, Detection Tower - these cards help to ensure that Yawgmoth can target any creature he wants and make them dead. I don't have a preponderance of Shroud or Hexproof creatures I need to worry about so I don't personally run them.
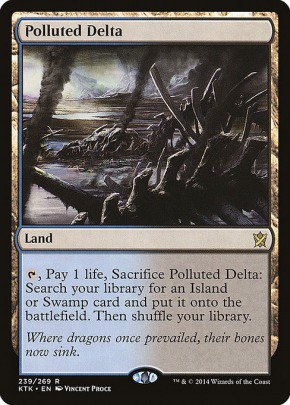
- Polluted Delta, Bloodstained Mire, et al - deck thinning and provides another chance for Bolas's Citadel to keep hitting cards.
- Volrath's Stronghold - I can't find my own copy of the card for some reason, otherwise it would be in the deck.
- Myriad Landscape - this card consumes WAY too much tempo on a consistent basis. Don't play it unless you don't want to run the Fetch land package.
- Inkmoth Nexus - this deck is very color hungry and I don't like spending my mana to make an Infect flier. I've also been asked to stay away from Infect cards in my deck, so I oblige my playgroup.
- Thespian's Stage - often is a 2nd copy of Nykthos or Cabal Coffers, I don't have a copy of this card and don't feel that it's necessary to the deck.
- Swamp, Snow-Covered Swamp - because duh.
Esper is an expansive canvas painted by precise, controlling hands. - here
Credits & Thanks
I'd like to thank my wife. You're the freaking best, there's no other way to put it. You've been there for me when other people haven't and we've learned to unconditionally support each other in the pursuit of our dreams, both mutual and individual. My ability to be creative and to write this resource stems in large part of this support and I love you so deeply for it.
Next, I 'd like to credit all the people who contribute to these forums. MTGNexus has been an awesome project to be a part of and I'm grateful to the Admins and members of this site that make it as vibrant and enjoyable as it is.
Lastly, I'd like to thank you, dear reader. This Primer was written and refined in the hopes that you would find it enjoyable, informative, and comprehensive. Maybe, just maybe, I've made you a convert to the noble work of Etherium and you will allow yourself to welcome the blessing of a filigree gaze and enhancement to your life. Who knows, it could perhaps even be a step towards the true goal of metallic evolution: compleation...
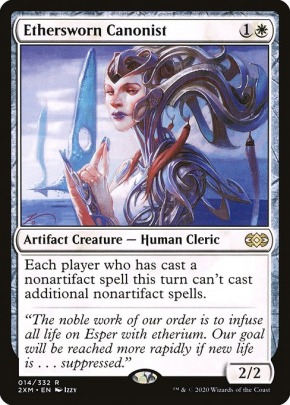
"The noble work of our order is to infuse all life on Esper with etherium. Our goal will be reached more rapidly if new life is… suppressed." - here
Changelog
This section is to have a running list of changes that I've made to the OP and my own personal decklist. Hopefully it will give you a reference point for how the deck has evolved since it was first created and give you an idea of what cards I've already tried and tested in this deck.
For specific explanations about why certain cards were cut and added to the deck, please refer to the actual post on the date specified in this Changelog. The post itself will have the reasoning behind why card were added/cut to the decklist so that this section is concise.
"I pray that I am never considered useless or old." - here


 Zacama

